| Previous
|
|


Exam Day Checklist
-
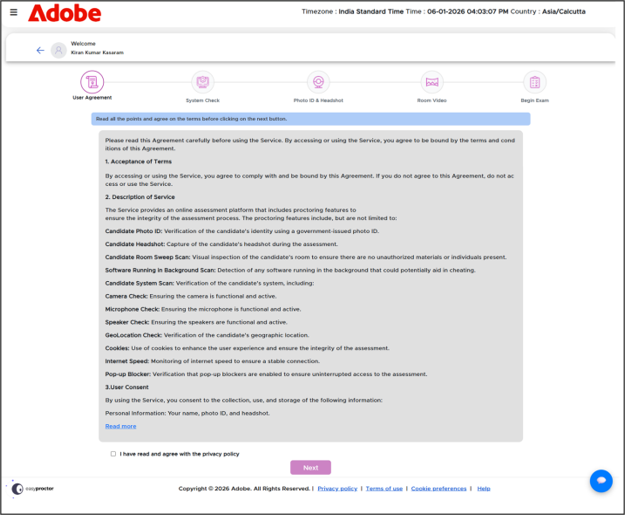
Click the Begin Exam button to navigate to the User Agreement page.
-
Before proceeding, candidates must read and accept the disclaimer agreement presented on screen. The Next button will remain disabled until the candidate checks the acceptance box confirming they have read and agreed to the terms. Click Next to navigate to System Requirements screen.
-
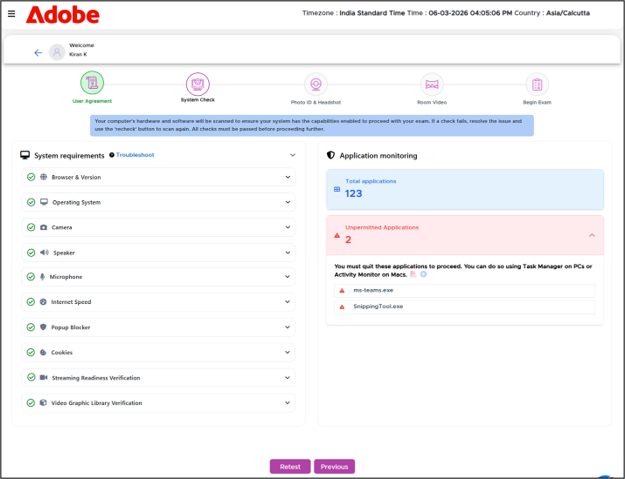
The right-hand panel displays both the applications currently running and those flagged as unpermitted. The figure shown in the red section indicates the total count of unpermitted applications, which are considered unsafe for online assessments.
-
Candidates are shown a list of prerequisite checks that must be reviewed before starting the assessment. This process helps ensure the system is fully compatible and ready for a secure assessment experience.
Steps to close unpermitted applications from Task manager
On the right-hand side, you can view the list of all running applications, including those marked as unpermitted. The number shown in the red section indicates the total count of unpermitted applications, which are considered unsafe for online assessments.
-
Open Task manager by pushing CTRL+ALT+DEL or CTRL+SHIFT+ESC
-
Search for the applications listed within Unpermitted Application section. (Ex. Snipping Tool)
-
Right click on the process for having the options to end the task
-
Click on ‘End Task'.
-
Repeat the same step for all the process until it displays 0 within the unpermitted section.
-
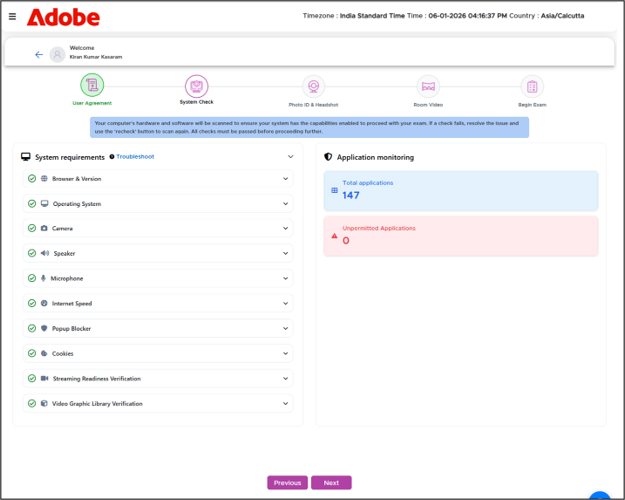
Once all unpermitted applications have been closed, the process tracker will display ‘0’. You can then proceed to the next step, which involves capturing your Photo ID and headshot.
-
Click on the Next button to navigate to the Photo ID & Headshot verification screen.
-
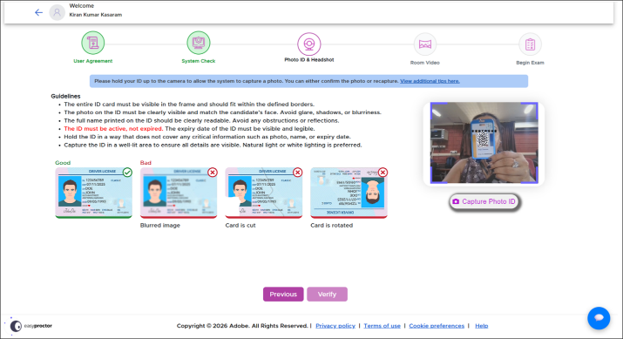
First, you need to show your Photo ID and allow the system to capture your photo ID by clicking on the Capture Photo ID button.

|
You have up to three attempts to recapture your photo ID, but only one attempt is allowed to capture your headshot. Please ensure both are clear and accurate before proceeding. |
What Happens During a Photo Capture Issue?
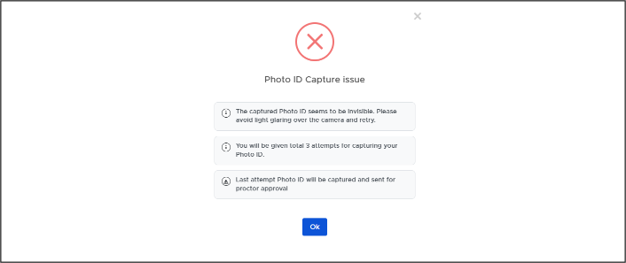
In a proctored exam setting, identity verification typically involves capturing a clear image of your Photo ID using your device’s camera. If the system detects that the ID is not visible—often due to glare, poor lighting, or incorrect positioning—it triggers an error message like the one below.
-
Click the OK button to acknowledge the message and proceed to the next attempt.
View the instructions for Photo ID submission by clicking here
-
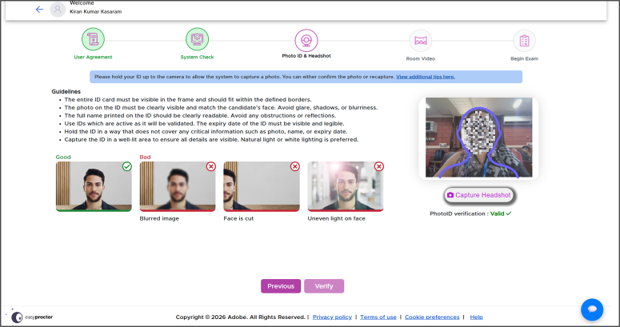
Redirecting back to the headshot and photo ID screen, you need to capture the headshot.
-
Click on the Capture Headshot and the image will be captured.
-
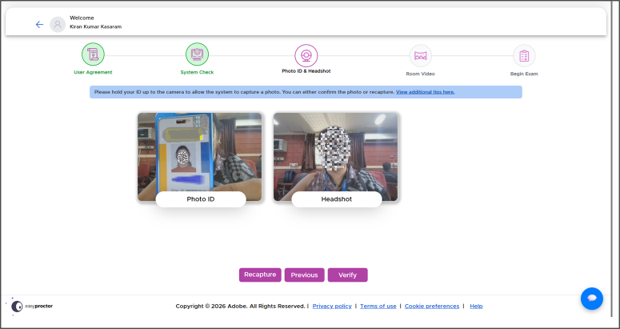
Here you can view the photo ID and Headshot captures.
View the instructions for headshot submission by clicking here
-
When you click the Verification button, the system navigates to the verification screen, displaying the ID status along with the extracted ID details. You can refer to the image below for visual guidance.
-
The verification process includes checks for photo comparison status, legal name status, and photo ID validity.
-
If the headshot does not match the photo ID, the system will display a status of Not Matched.
-
It also verifies whether the provided photo ID is valid and whether the legal name matches the ID.
-
If any of these checks fail, you can retake the photo ID and headshot by clicking the Recapture button.
-
To proceed, click the Next button to navigate to the Room Video capture screen.
-
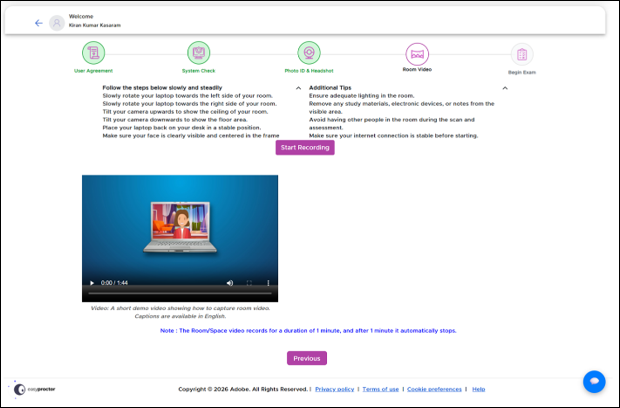
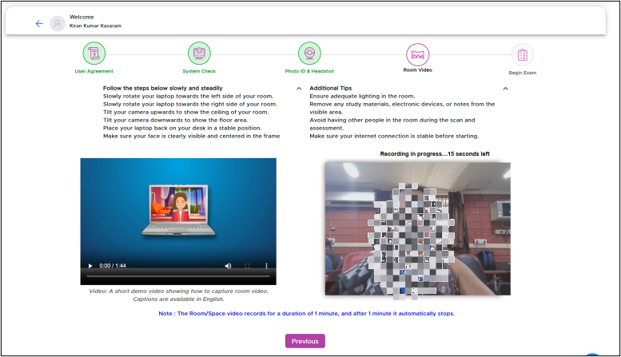
For ensuring secure and fair test-taking, the system will capture the video of your room. This helps the proctor to understand the environment of the candidate. You need to rotate your system to capture the room space.
-
The system will automatically start capturing the video of your room for 1 minute and after 1 minute, the video capturing will end automatically.
-
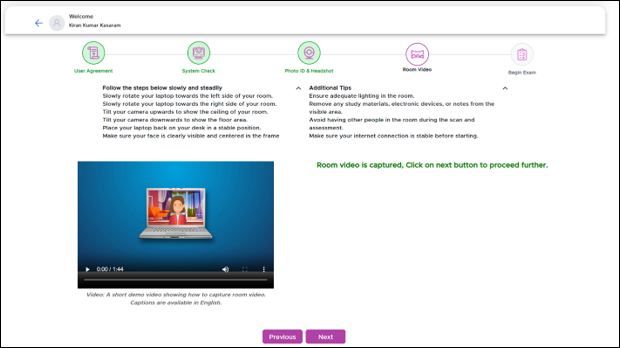
Once the room video has been captured, an inline message appears stating Room video is captured. Click the Next button to continue with the exam.
-
Click on the Next button, to navigate to Begin Exam screen.
-
The AI system will automatically compare your Photo ID with your headshot, and extract key details such as your legal name from the ID. The captured details are then cross verified with the information already stored in the application to ensure accuracy and consistency.
-
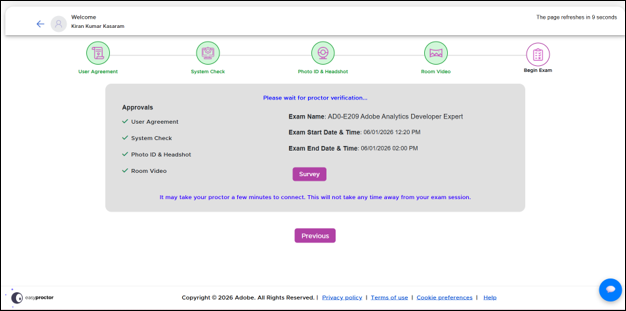
After the candidate submits their photo ID, headshot, and room video, the proctor will review and approve the verification. During this review period, an inline message will appear stating: “Please wait for proctor verification.”
-
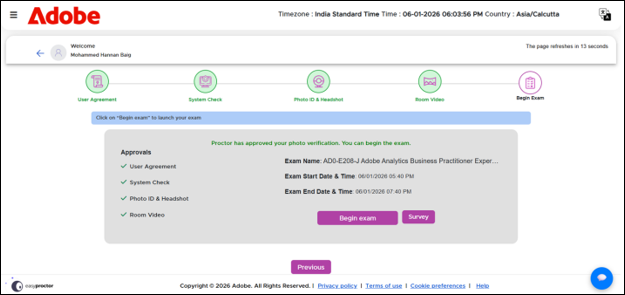
Once the proctor completes the verification, the Begin Exam button will become visible, allowing the candidate to proceed.
|
|
Even if you complete the pre-assessment checks ahead of the scheduled time and the Begin Exam button is visible, you will not be able to begin the test until the scheduled start time. |
 Other Topics