Camera Troubleshooting Enabling Permissions
If you are experiencing issues with camera access during your proctored exam, try the following steps to grant the site the necessary camera permissions:
Step 1
-
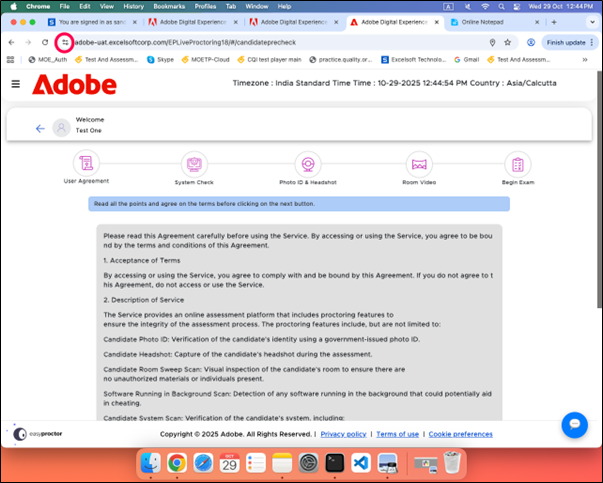
Click the View Site Information
 icon located to the left of the address bar to open the site settings. In the image below, the icon is clearly marked in red to help you identify it easily.
-
A dropdown will appear showing site-specific settings.
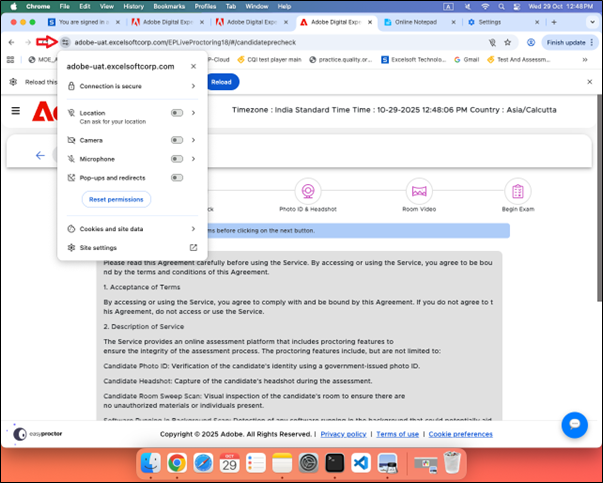
Step 2: Check Camera Permissions
-
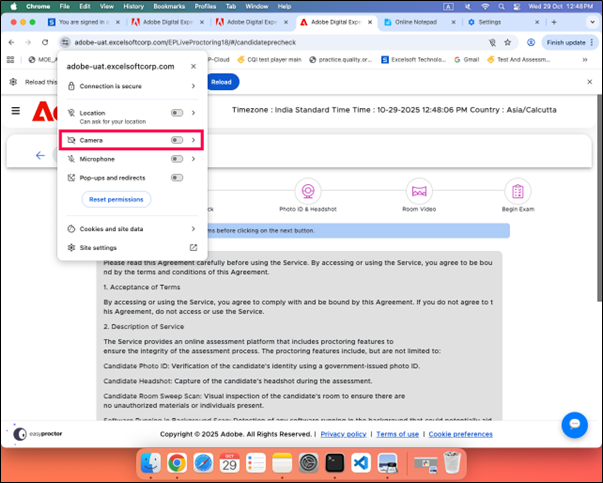
In the dropdown, look for Camera.
-
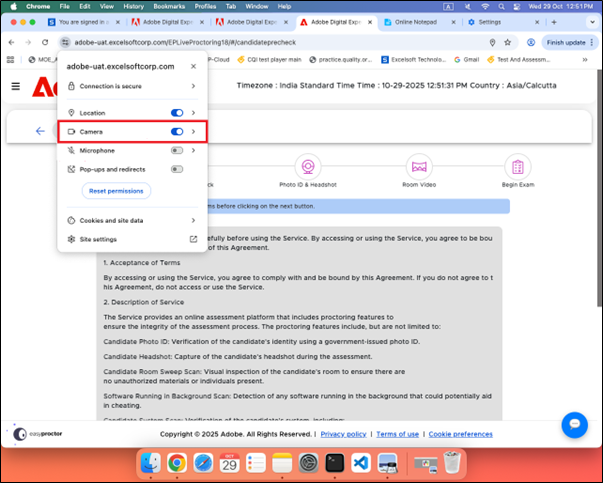
If the camera permission is set to Blocked or Disabled, click the toggle switch to turn it on.
-
Use the arrow adjacent to the toggle switch to view the camera permission details.
-
Click the Close icon to exit the site-specific settings panel.
Step 3: Reload/ Refresh the Page
-
After changing the setting, your browser may prompt you to reload the page to apply the new permissions. Click Reload button.
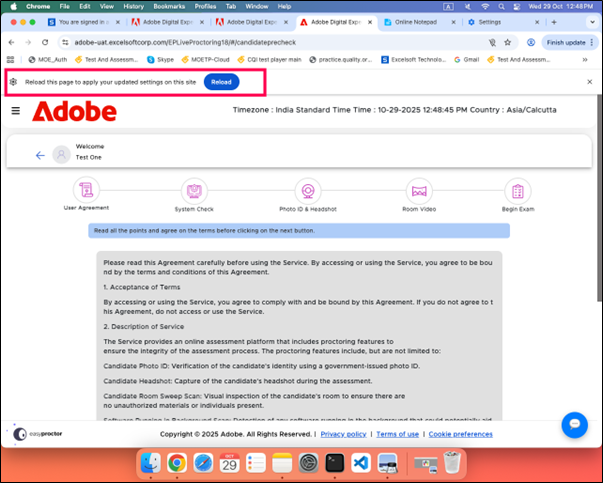
You can also refresh the exam page to apply the new permissions.
-
The system check screen should now detect your camera.
Ready to learn?Click  to play the tutorial.